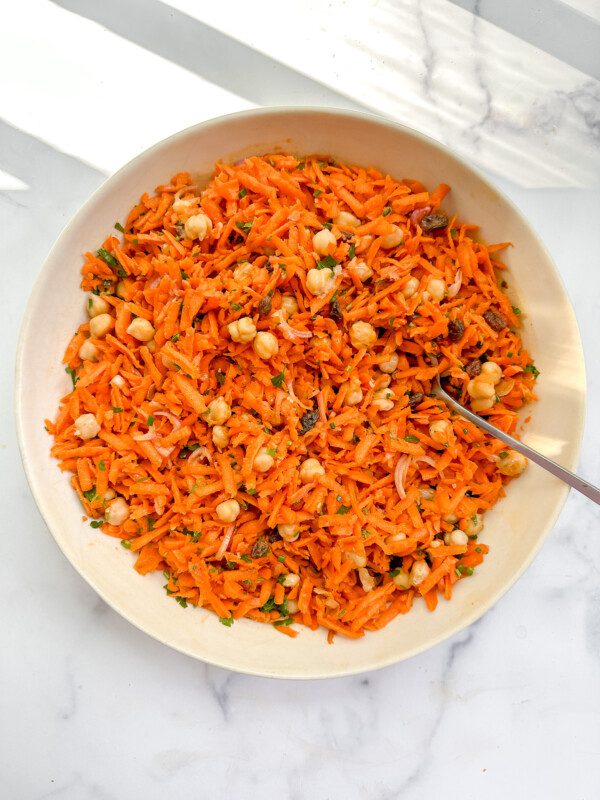
Kimchi Tuna Salad (Gluten Free, Dairy Free)
I love a good twist on a classic, and for good reason – sometimes, although a recipe is well loved, it’s time to spice things up a bit. Well, my Kimchi Tuna Salad has just entered the chat.
Whether you have perfectly ripe pears begging to be used or simply have a craving for a healthy, easy dessert you can make ahead of time, this recipe is the answer.
This recipe might just be the perfect bite of Spring you’ve been looking for! My Lemon Coconut Macaroons started with my nana: she made wonderful macaroons and had a love for coconut that I share. I couldn’t help but create these melt-in-your-mouth cookies in her honor.
I’ve decreased the sugar and added in 1 tablespoon of coconut flour to help the batter stay together and absorb any little bits of liquid. This keeps the macaroons high and fluffy, as well as preventing them from spreading too much in the oven. The addition of lemon zest may not be traditional, but it adds a delicious twist to this classic treat, and they’re a real crowd pleaser making them perfect for Easter or Passover meals with family and friends.
These gluten free, dairy free macaroons are best the day they are made, but will last up to 5 days covered and kept at room temperature – they’ll get softer each day (if they aren’t consumed first that is!).
So who’s making these?
If you’re in need of some more sweets and treats, be sure to follow me on Facebook, or see all of my favorites (and so many other delicious recipes!) over on Pinterest.
Step 1. Preheat oven to 325F. Line two large baking sheets with parchment paper.
Step 2. In a medium bowl, whisk together the egg whites, salt and sugar until white and creamy, about 30-45 seconds. Add the vanilla and whisk just to combine.
Step 3. Using a rubber spatula, fold in the dried coconut flakes, flour and lemon zest. Continue mixing the batter until all of the coconut flakes are moist and suspended in the batter.
Step 4. Using an ice cream scoop or two spoons to portion about 2 tablespoons of batter each, drop the batter onto the prepared baking sheets. You want to have 8-9 drops of batter per sheet with a few inches in between. Use the spatula to push in the sides of the drops of batter to even them out into circles, if desired.
Step 5. Bake, switching the pans from back to front and top to bottom halfway through, 18 to 22 minutes until well browned on the bottoms, sides, and tops.
Step 6. Once baked, let the macaroons cool completely on the sheet pans before using a spatula to remove.
Step 7. Enjoy!
They are the perfect Spring-inspired bite
These macaroons are best the day they are made, but will last up to 5 days (if they don’t get eaten first!)
The Famous Maialino Olive Oil Cake, But Healthier (Gluten Free, Dairy Free)
No-Bake Strawberry Shortcake Truffle (Gluten Free)
Salted Tahini Chocolate Chip Cookie Bars (Paleo)
If you make my Lemon Coconut Macaroons, and I hope you do, please leave me a comment here and rate the recipe. Your feedback means a lot to me! You can also post to Instagram and tag me so I can share your creations!
If you like full recipe videos, you’ll want to follow me on Facebook and Youtube as I publish new videos daily!
This year we made food the way it was meant to be made – delicious, filling and packed with flavour! In 2022, we tried new flavor combinations, different ways to prepare old classics and found some new favorites along the way.
My Chili Caramel Brussels Sprouts are an adventure in flavor, featuring a stunning umami glaze and picture perfect caramelization that makes me want to stand over the stovetop and finish them all by myself.
Crispy on the outside and rich, tender and juicy on the inside is exactly how chicken thighs should be. This recipe one of my go-to’s for reliably creating mouthwatering chicken every single time, and with only a handful of pantry-essential ingredients, it is an easy dinner to put together at short notice.
Chicken thighs—especially if they’re skin-on—have more fat and therefore are less inclined to dry out, and that is also what ensures the skin crisps up as beautifully as this, holding in all of the flavorful juiciness of that rich, tender dark meat.
Chicken thighs have become more popular in recent years, and for good reason. The meat is less expensive than breast and it offers a rich, full flavor that makes it perfect for the classic flavourings I’ve used here: woodsy rosemary sprigs and bright lemon.
If you’re in need of some more mouthwatering chicken recipes, be sure to follow me on Facebook, or see all of my favorites (and so many other delicious recipes!) over on Pinterest.
Step 1. Season the chicken thighs and add them to a cold cast iron skillet, skin side down.
Step 2. Turn the heat to medium and cook them without moving them for about 15 to 30 minutes. Reduce the heat if the skin begins to burn before it gets evenly golden brown.
Step 3. Turn the thighs over and stir in the lemon slices, and rosemary sprigs into the pan juices, tucking the rosemary under the chicken.
Step 4. Continue cooking the thighs until the meat closest to the bone is cooked through, about 15 minutes more.
Step 5. Remove the rosemary and serve the thighs and lemony pan drippings with lemon wedges.
Step 6. Enjoy!
Chicken thighs are a less expensive cut of meat, but are just as rich and flavorful as breast
This recipe uses ingredients you will almost certainly have on hand in your pantry
It’s Gluten-Free, Dairy-Free and Paleo
There’s absolutely no-fuss here!
Miso Teriyaki Chicken (AKA The Best Grilled Chicken)
The Ultimate Grilled Chicken Marinade (Gluten-Free, Dairy-Free, Paleo)
Crispy Grain-Free Chicken Cutlets
Creamy Chicken Tortilla Soup (Gluten-Free, Dairy-Free, Whole 30)
If you make my No-Fuss Crispy Chicken Thighs, and I hope you do, please leave me a comment here and rate the recipe. Your feedback means a lot to me! You can also post to Instagram and tag me so I can share your creations!
If you like full recipe videos, you’ll want to follow me on Facebook and Youtube as I publish new videos daily!
I can’t think of a more comforting fall dessert than Cardamom Apple Crisp. It’s a wonderfully warming dessert with a jammy apple filling, packed with big flavor from cinnamon and cardamom, and sweetened just right with maple syrup.
Say hello to the only pumpkin bread recipe you will ever need: crunchy topped, tender crumbed, perfectly moist and sweet
When you google “pumpkin muffins” hundreds of recipes come up, do you really need another one? Yes, because this is the only recipe you actually need. They are high-domed, just like the bakeries, with a sweet and crunchy top and tender, moist crumb flecked with fall spices.
My husband Michael declared these perfect, and he isn’t all that crazy about pumpkin foods traditionally, so that’s saying a lot.
It uses a whole can of pumpkin so you know we aren’t making dry muffins here.
If you’re in need of some more cozy comfort fall recipes, be sure to follow me on Facebook, or see all of my favorites (and so many other delicious recipes!) over on Pinterest.
Step 1. Preheat oven and spray the cups of a standard 12 cup muffin tin with non-stick baking spray or use muffin liners.
Step 2. In the bowl of a stand mixer, or using a large bowl and whisk, briefly whisk together all dry ingredients.
Step 3. Add to the bowl the pumpkin, coconut oil, and coconut sugar and mix to combine so there are no flour streaks visible.
Step 4. Add the eggs and whisk for 10 seconds more to combine.
Step 5. Transfer the batter evenly into the muffin cups. Distribute the Demerara sugar and/or try it with chopped pecans, evenly over the tops of the muffins.
Step 6. Bake for 20-25 minutes until a cake tester comes out just clean.
Step 7. Cool for 10 minutes in the pan before transferring to a rack to cool completely.
Step 8. Enjoy!
You get that soft, melt in your mouth, bakery-style muffin without having to leave your house
They’re the perfect after school snack because they’re gluten free, dairy free and refined sugar free (if you choose to make them this way), perfect for any dietary requirements!
They stay moist and tender for up to 4 days
No-Bake Pumpkin Truffles (Gluten Free, Dairy Free, Refined Sugar Free)
One-Bowl Pumpkin Banana Bundt Cake (Gluten Free)
If you make my Bakery-Style Pumpkin Ginger Muffins, and I hope you do, please leave me a comment here and rate the recipe. Your feedback means a lot to me! You can also post to Instagram and tag me so I can share your creations!
If you like full recipe videos, you’ll want to follow me on Facebook and Youtube as I publish new videos daily!
This soup is for my hungry ladies. Or men. Anyone with a stomach and taste buds really. It’s hearty, healthy, and so satisfying… a real meal in a bowl type of soup. It comes together in just 30 minutes but tastes like it’s been simmering…
The combination of almond, cranberries, and orange in this moist company cranberry almond bundt cake just sings “the holidays are here!”
I will start this post simply with this:
This is my favorite chocolate cake of all time.
When it comes to a celebratory, layered and frosted chocolate cake I have turned to the Horseradish Grill’s chocolate cake ever since learning the recipe in culinary school. It is excellent, impossibly fudgy and decadent.
But there is another place in my life for an everyday chocolate cake that is easier to make and a bit more virtuous. You know by now that I am very much an “everyday baker” type of person and don’t need a reason to eat a slice of cake any night of the week.
This Chocolate Olive Oil Cake is perfect, truly. Whether you want to eat a piece with your hands, in your pajamas (the most common way for me, admittedly) or serve to a room full of guests for Christmas or a dinner party, you simply won’t be disappointed.
If you’re in need of some more delicious dessert recipes, be sure to follow me on Facebook, or see all of my favorites (and so many other sweet treats) over on Pinterest.
Step 1. Preheat oven to 350 Degrees F. Spray a 9 or 10 inch cake pan with nonstick spray and line the bottom with parchment paper.
Step 2. In a large bowl, whisk together the flour, cocoa powder, baking soda, baking powder, sugar, and salt.
Step 3. In a separate medium bowl, whisk together olive oil, eggs, vanilla, milk, and coffee until blended.
Step 4. Add liquid to the flour mixture and mix together until no traces of flour remain.
Step 5. Pour cake batter into the prepared pan and bake for 60-75 minutes, until the a cake tester comes out just clean.
Step 6. Allow cake to cool in the pan for 20 minutes before inverting onto a cooling rack to cool for at least two hours.
Step 7. Serve dusted simply with powdered sugar, or with a cherry compote and whipped cream if desired.
Step 8. Enjoy!
“My favorite chocolate cake” is a big claim, and not one I take lightly. Here’s why I stand by that:
I tend to serve this one of two ways:
With a simple dusting of powdered sugar
With a dollop of whipped cream and a cherry compote. For this, I simply simmer frozen cherries with a squeeze of lemon and a pinch of sugar, salt, and nutmeg.
If you make my Chocolate Olive Oil Cake, and I hope you do, please leave me a comment here and rate the recipe. Your feedback means a lot to me! You can also post to Instagram and tag me so I can share your creations!
⭐⭐⭐⭐⭐
Rating: 5 out of 5.If you like full recipe videos, you’ll want to follow me on Facebook and Youtube as I publish new videos daily!