This post may contain affiliate links.

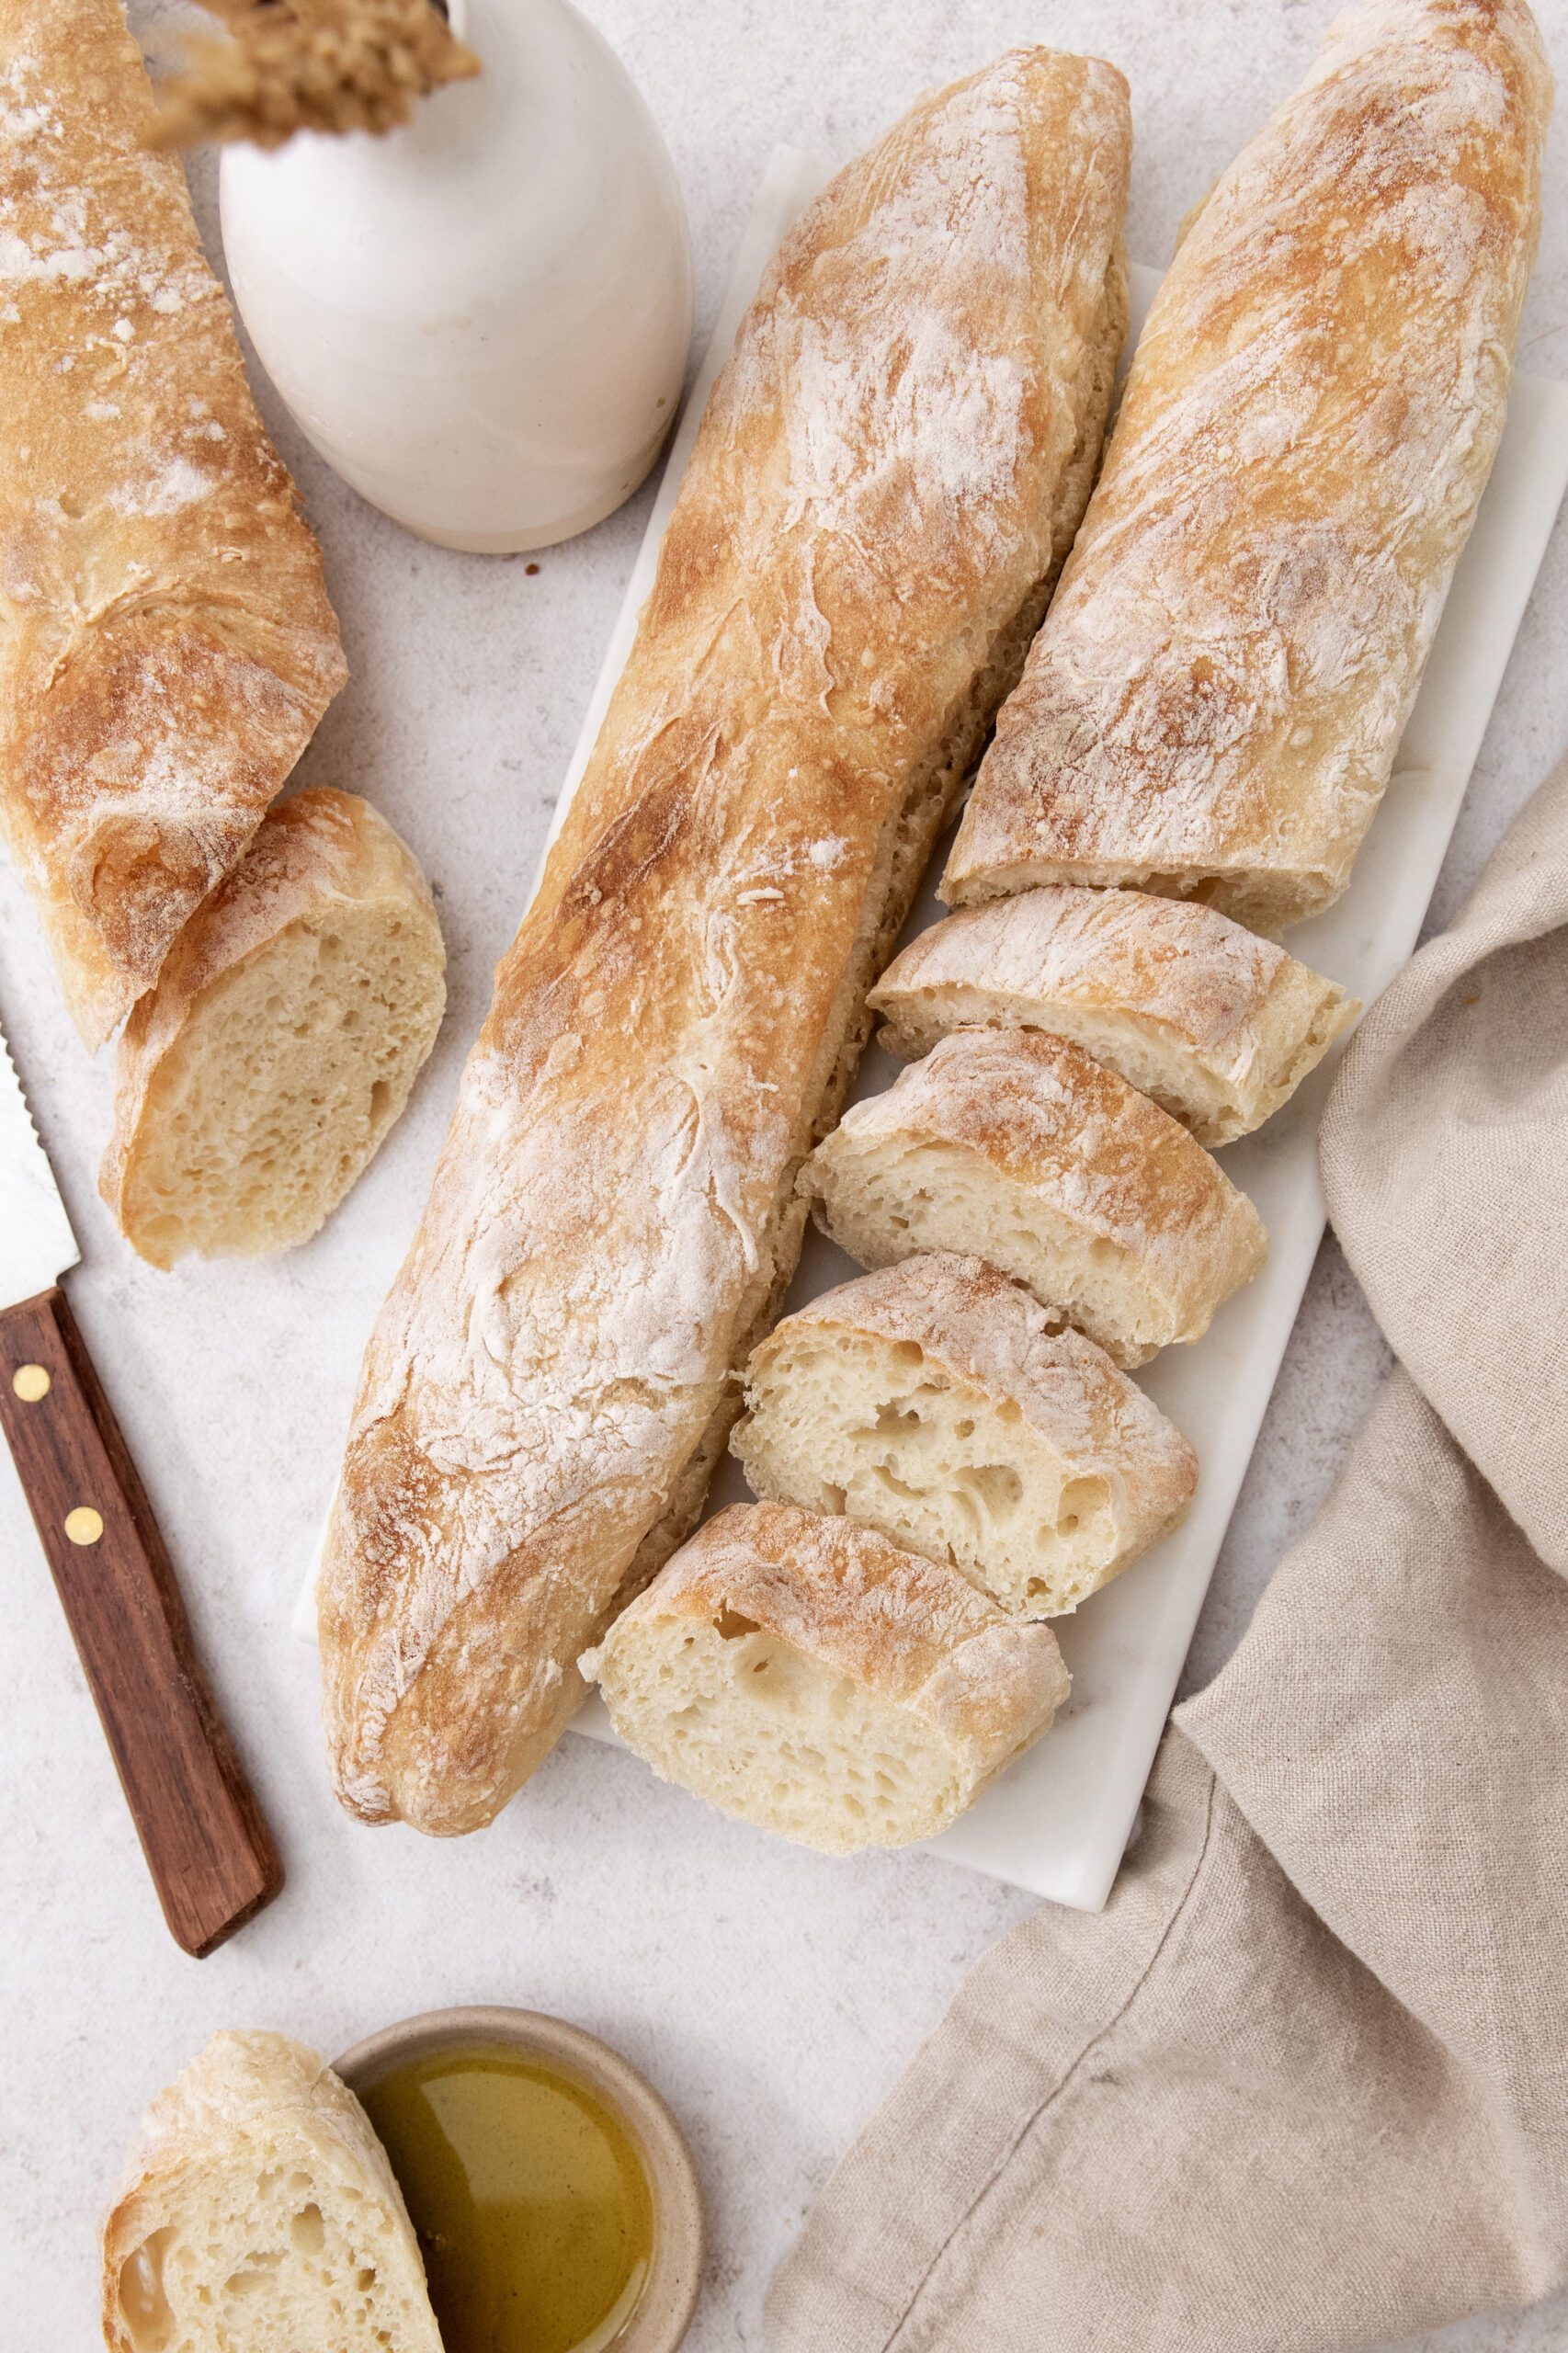
The recipe you’ve begged and pleaded for is finally here…I’m calling it Same Day Baguette, because I wanted you to be able to mix, bake, and eat it all in the same day. No overnight rise, no days of planning. Just delicious bread, same day, made by YOU.
I have been testing this for months (as in almost 20 months to be exact) and I finally believe we have hit perfection! I am beyond excited to share this recipe with you, because I am quite certain, it is going to knock your socks off!!!
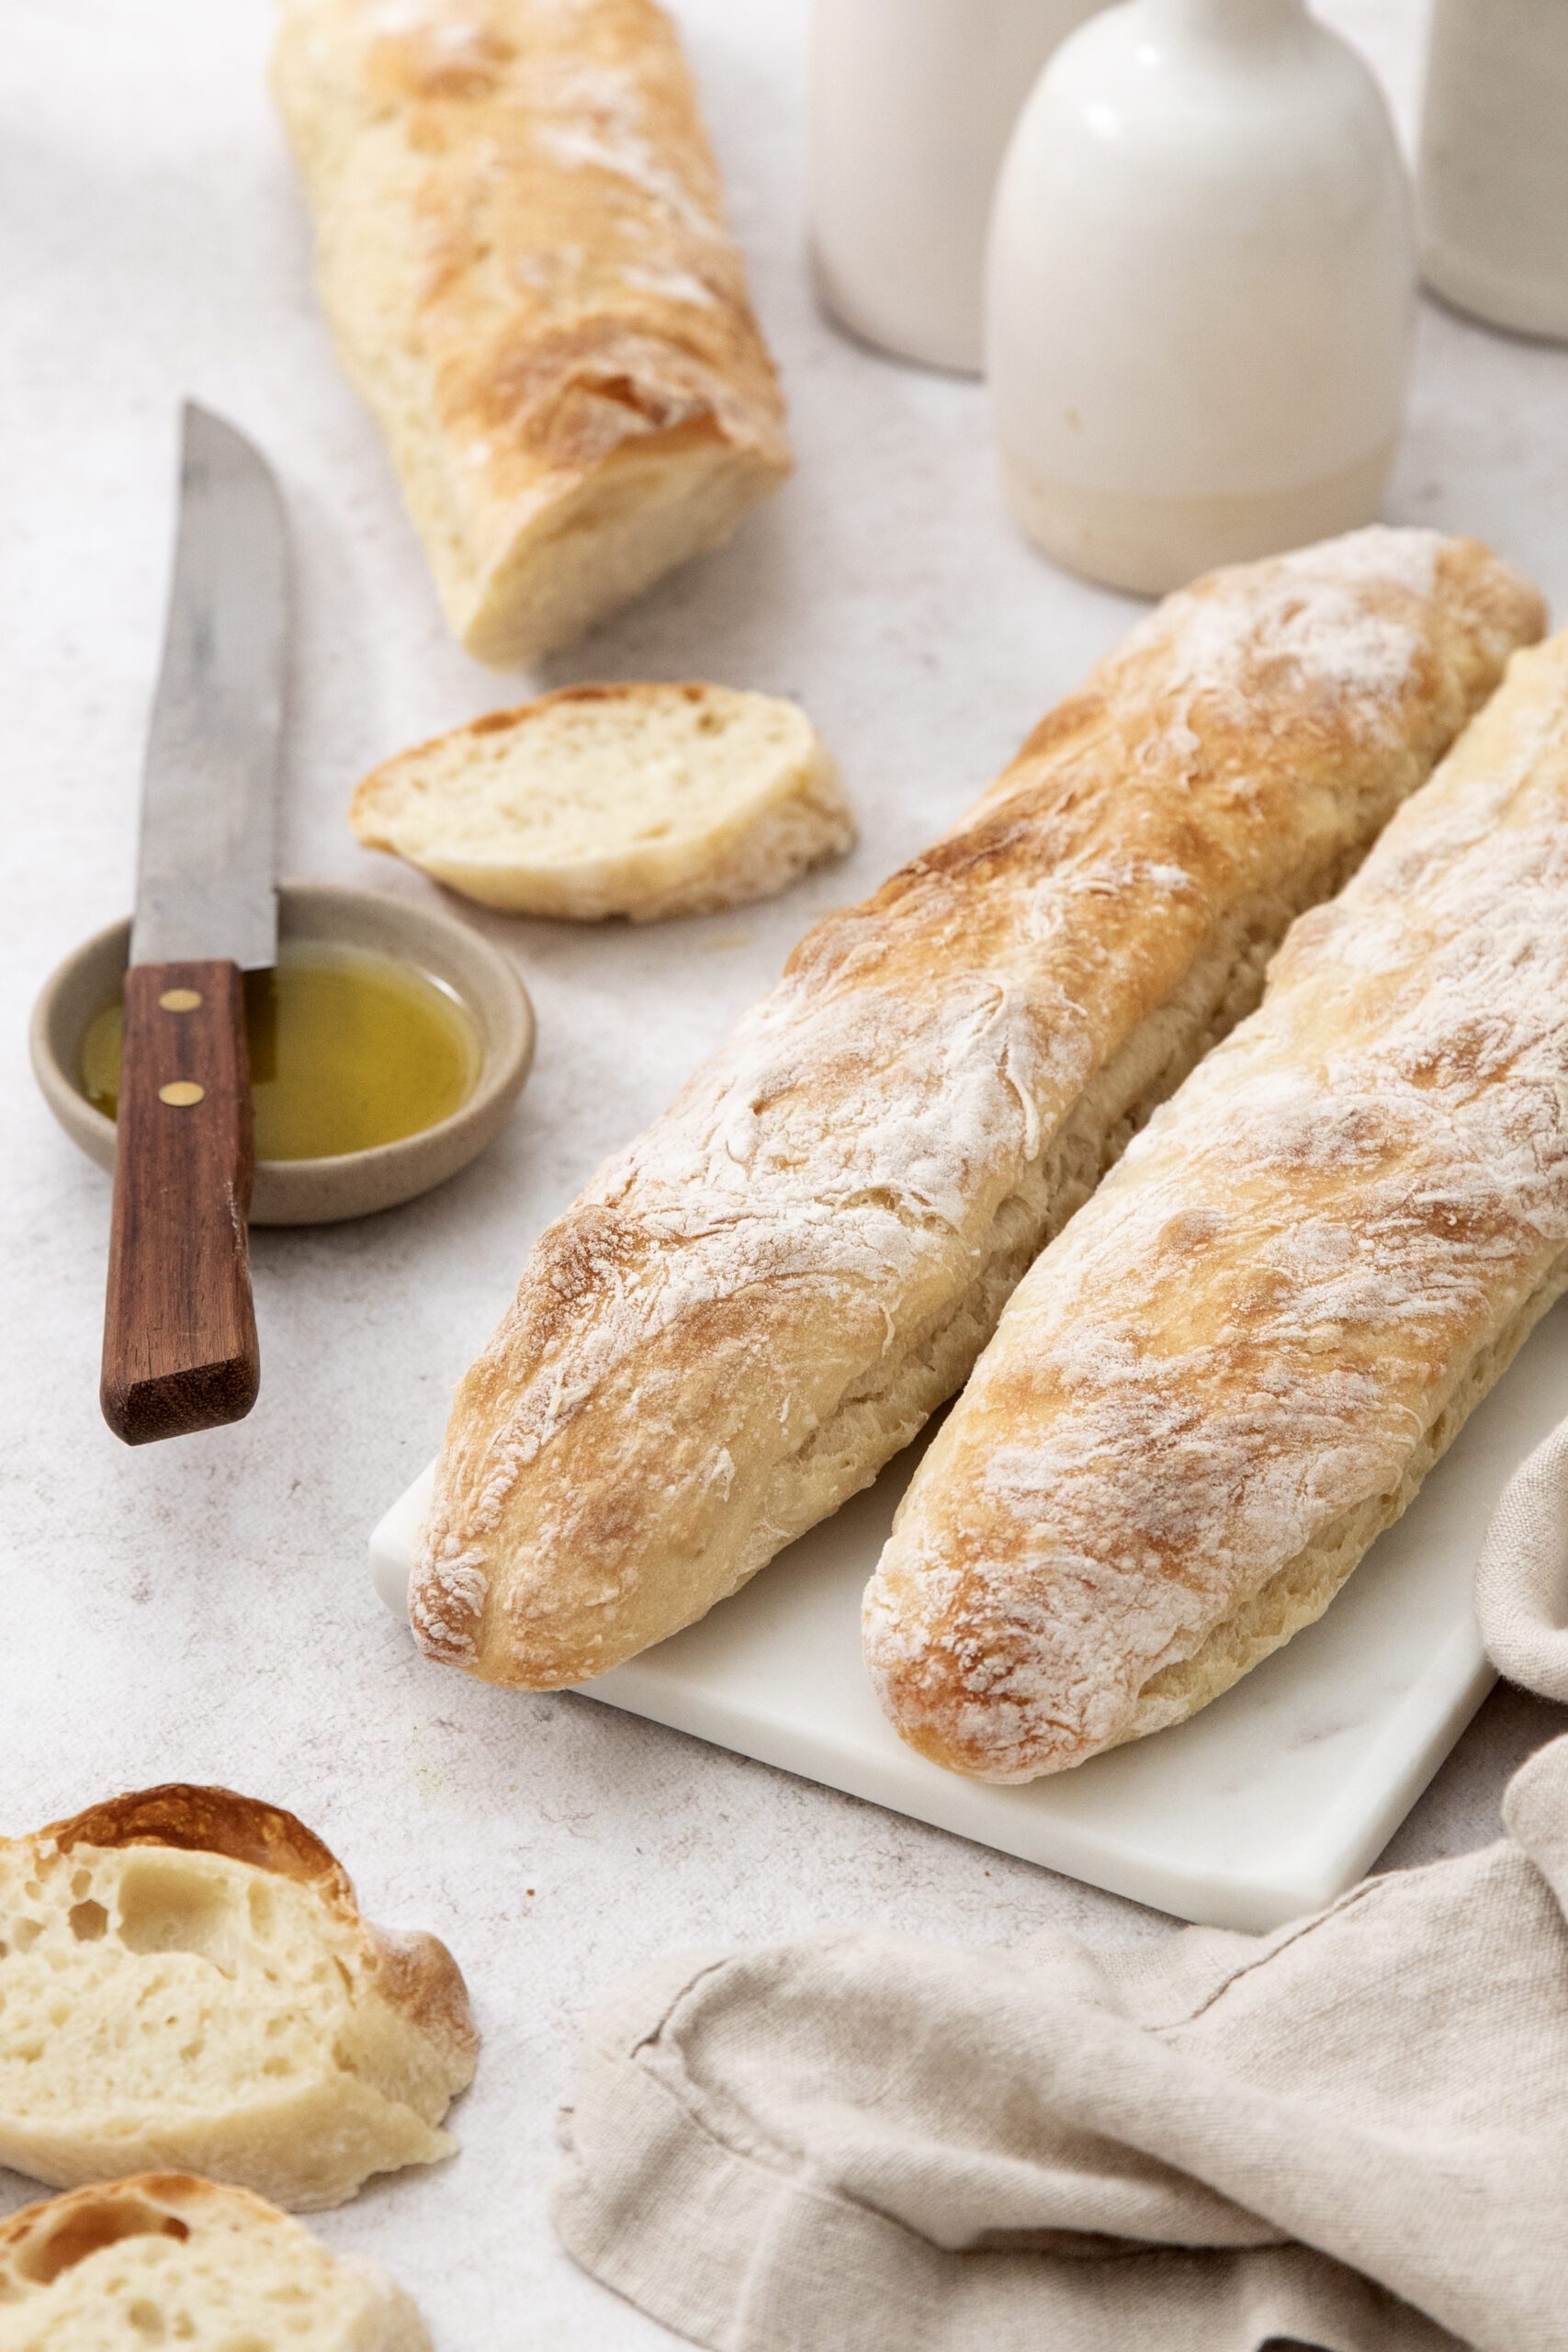
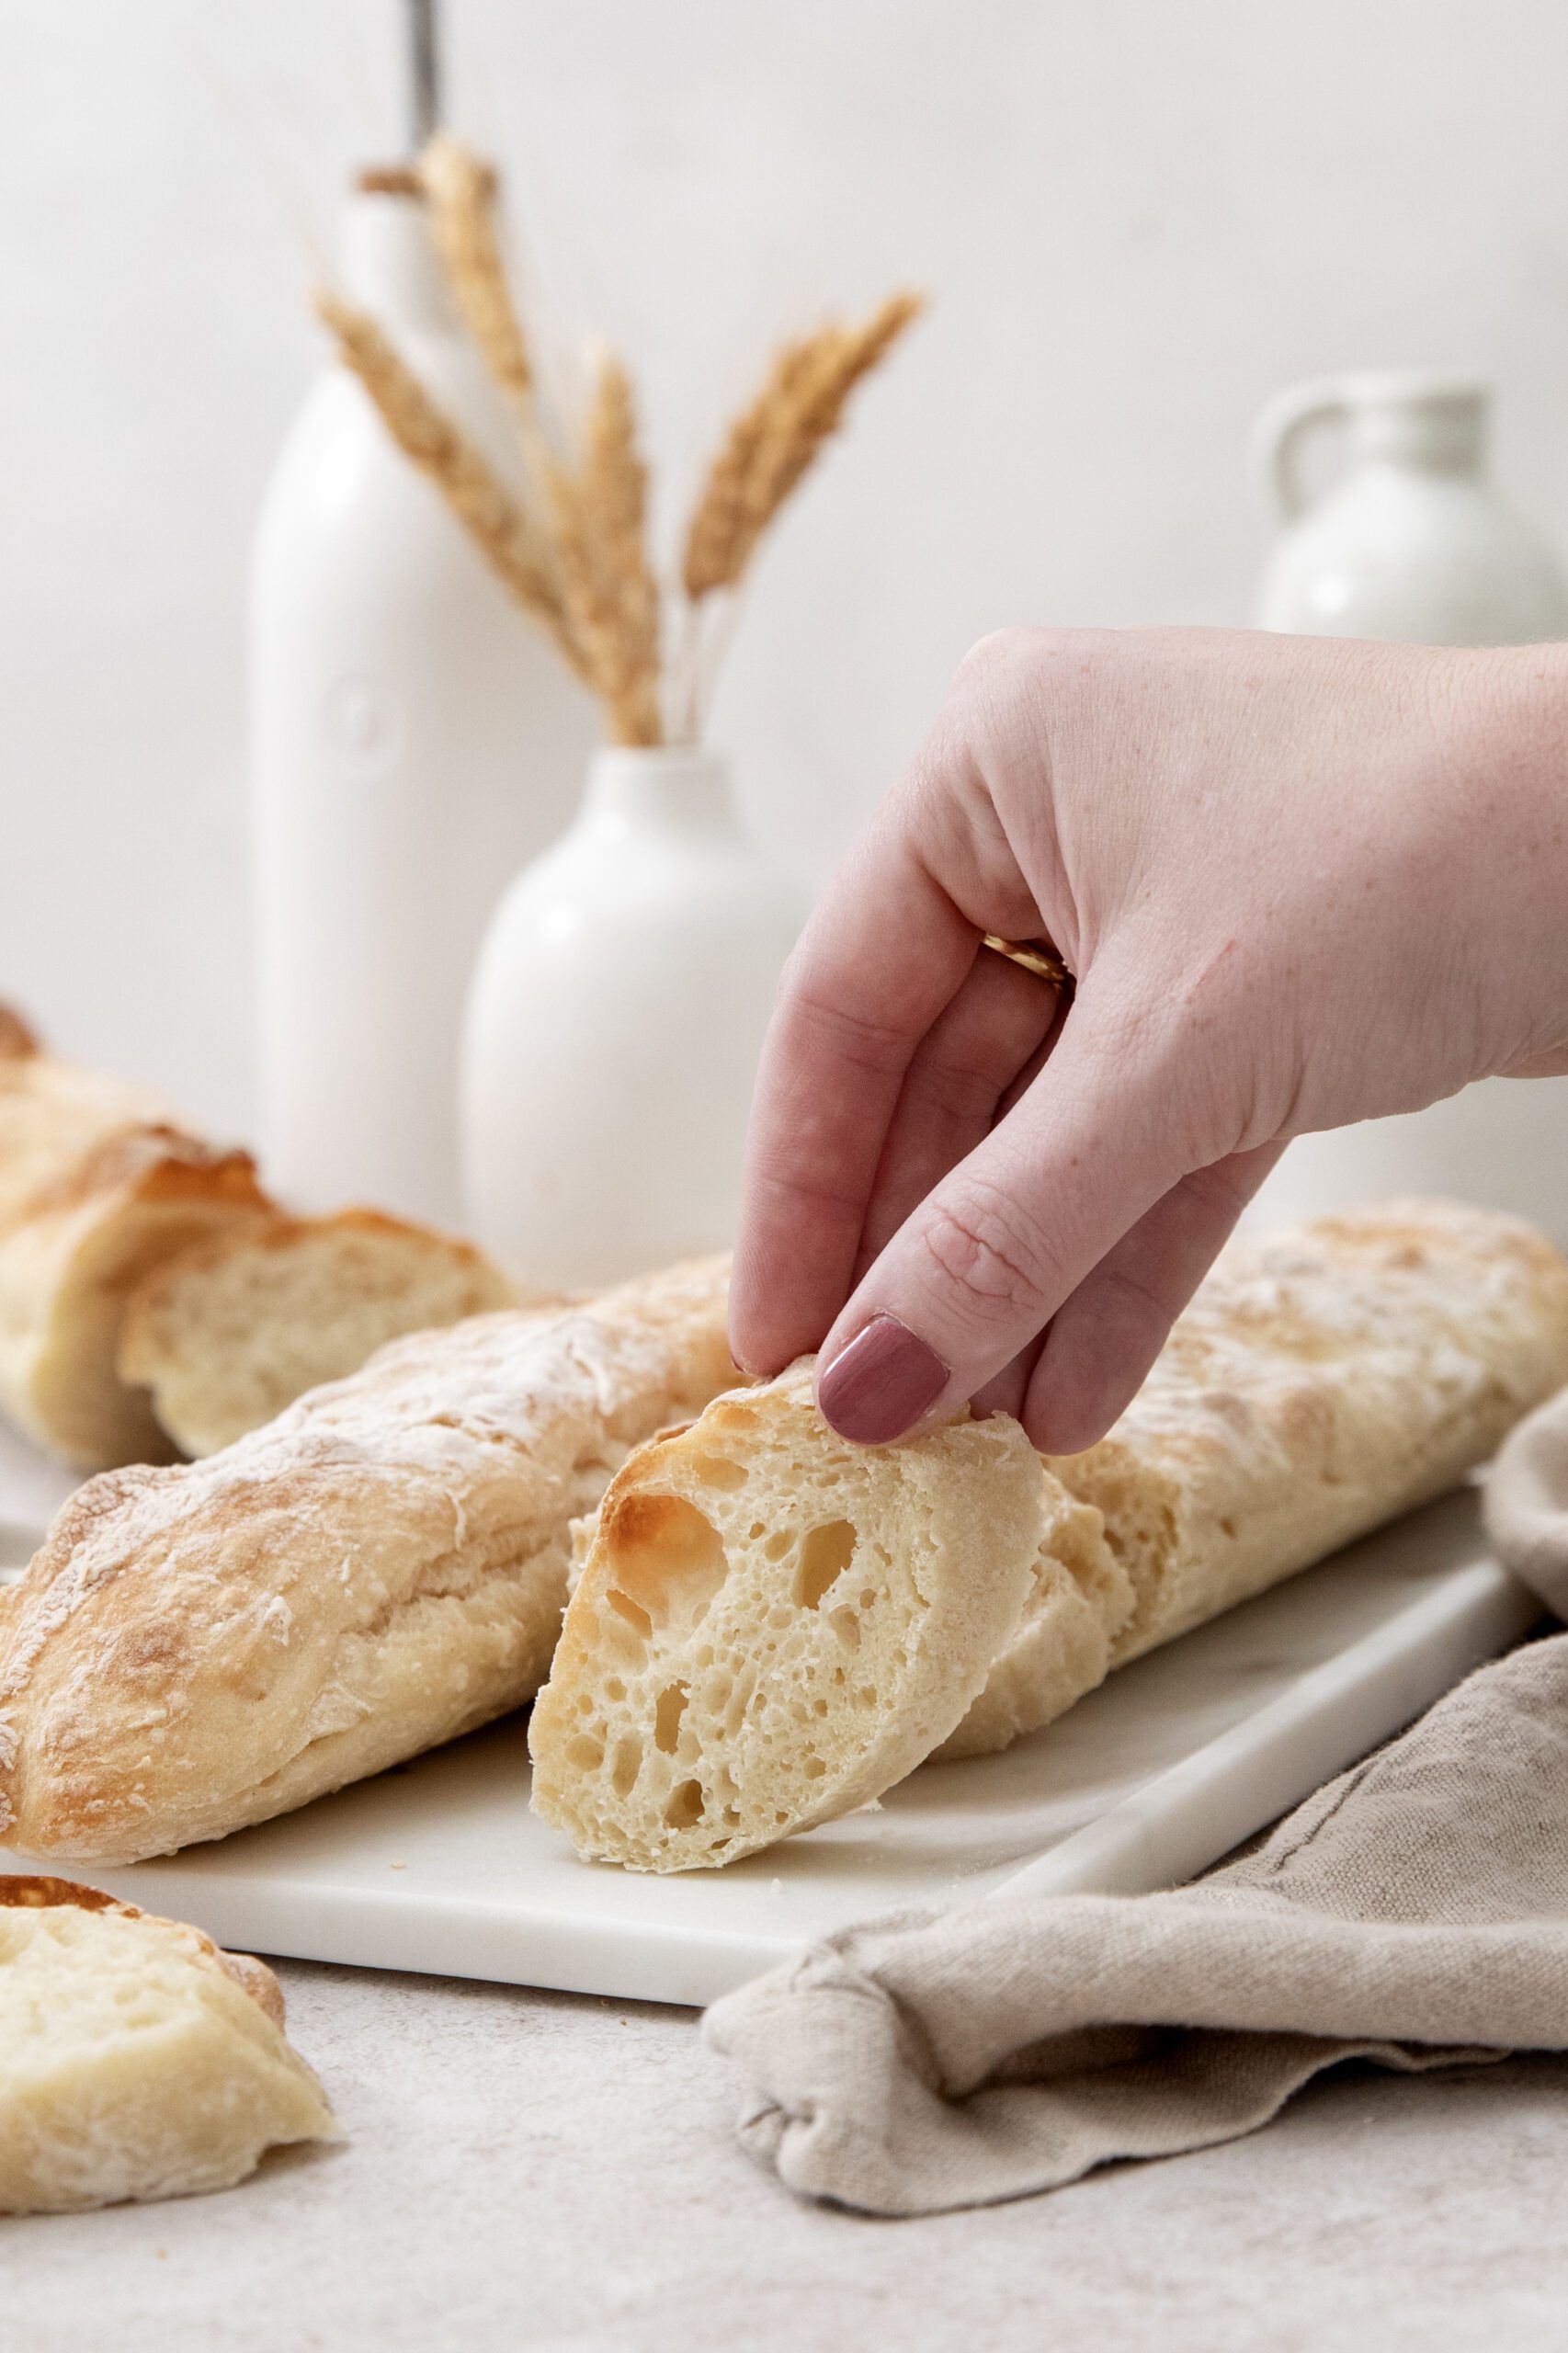
It is crispy & crusty on the outside, soft chewy interior with gorgeous airy pockets. I love to slather a piece with a good butter right when it comes out of the oven & top with a sprinkle of flaky sea salt. This right here is my love language!
The possibilities with this baguette are endless. I love to serve alongside soups or salads, or on an appetizer board with grilled veggies and whipped feta. My family loves tuna melts & I recently made them for dinner using the baguette and they were out of this world!
😍Why You’ll Love My Same Day Baguette
Making bread can be very intimidating and I wanted to make it completely approachable for the everyday home cook. No fancy equipment. No complicated steps. Just easy & delicious.
You can mix, bake, and enjoy it all in the same day. No overnight rise. No stress. Just warm, crusty delicious bread on your table, that will be devoured in minutes.This recipe is easy enough for beginners, but the results are brag-worthy.
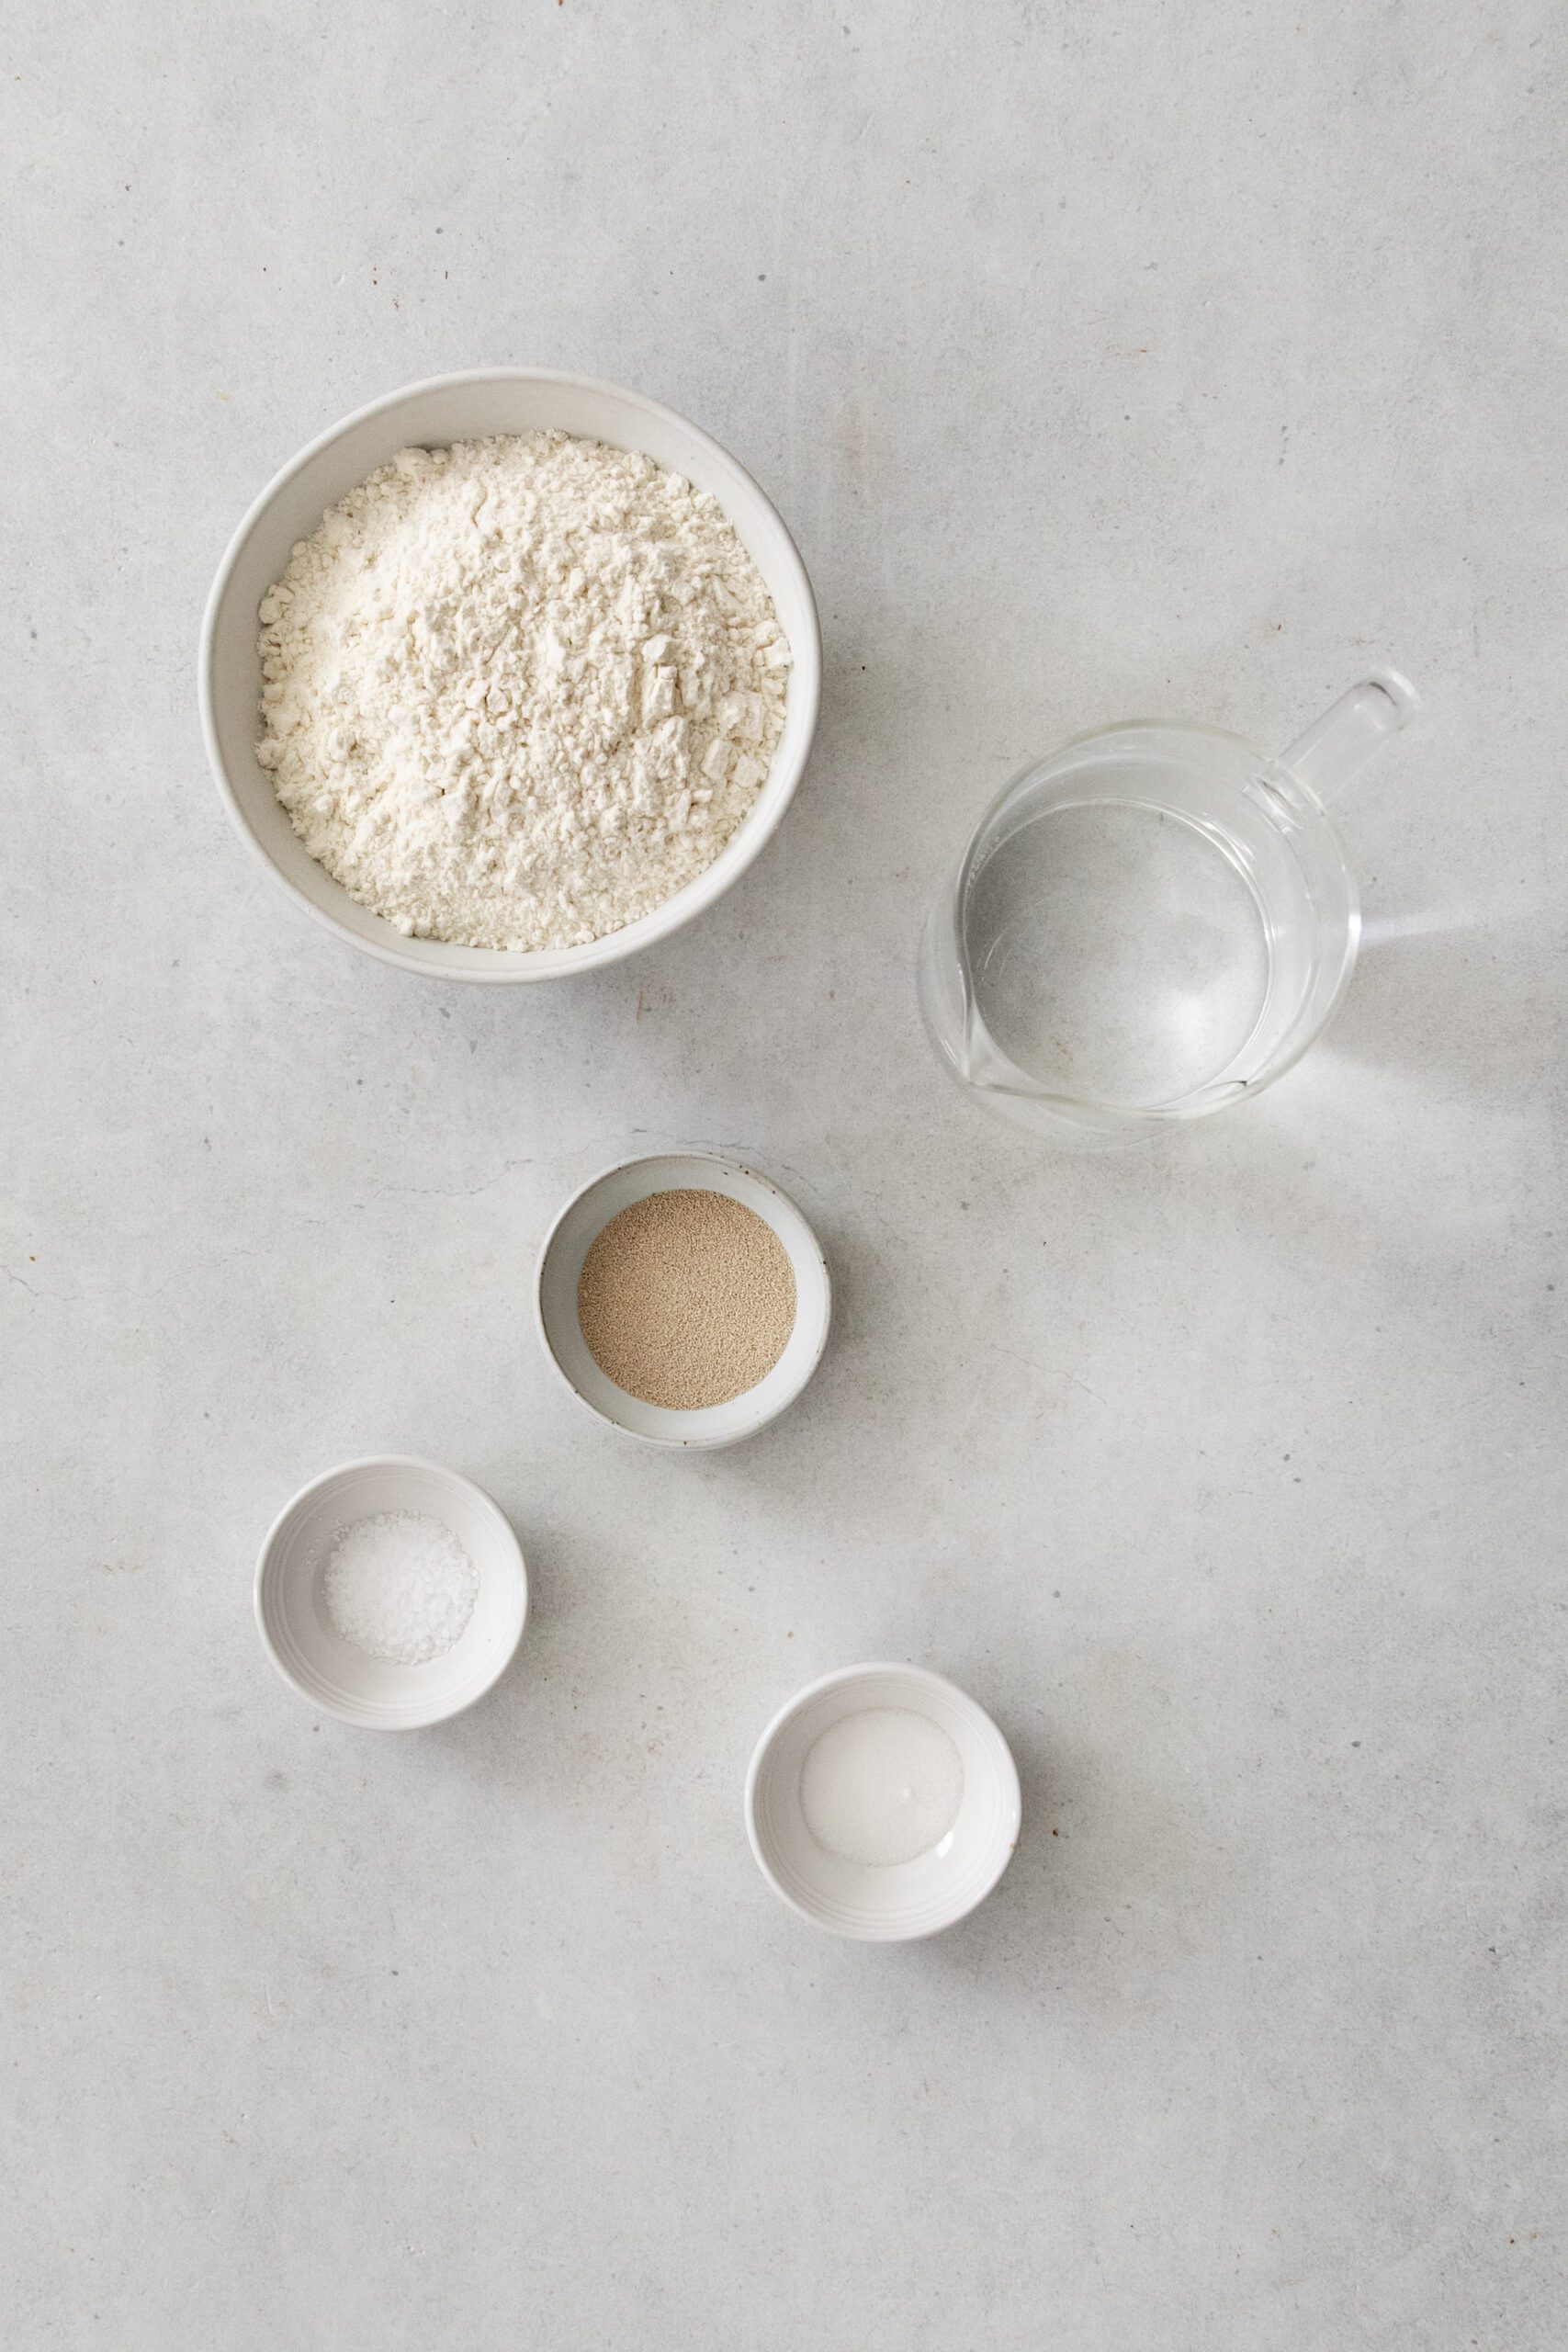
🗒️ Ingredients
Instant Yeast– This is the magic that makes the dough rise fast. Instant yeast doesn’t need to be activated in water first, it goes straight into the flour and starts working quickly!
Sugar
A touch of sugar helps feed the yeast and encourages a strong rise. It also contributes just a hint of sweetness to balance the flavor of the crusty bread.
All-Purpose Flour
The base of your baguette! All-purpose flour gives the dough a great balance between softness and structure. For chewier texture, you can sub in some bread flour.
Kosher Salt
Essential for bringing out the flavor of the bread and controlling the yeast. Don’t skip it, it’s what keeps your bread from tasting flat or bland.
Warm Water
Water activates the yeast and hydrates the dough. Make sure it’s warm to the touch (around 105°F–115°F), not hot, so it doesn’t kill the yeast.
👩🍳 How to Make My Same Day Baguette
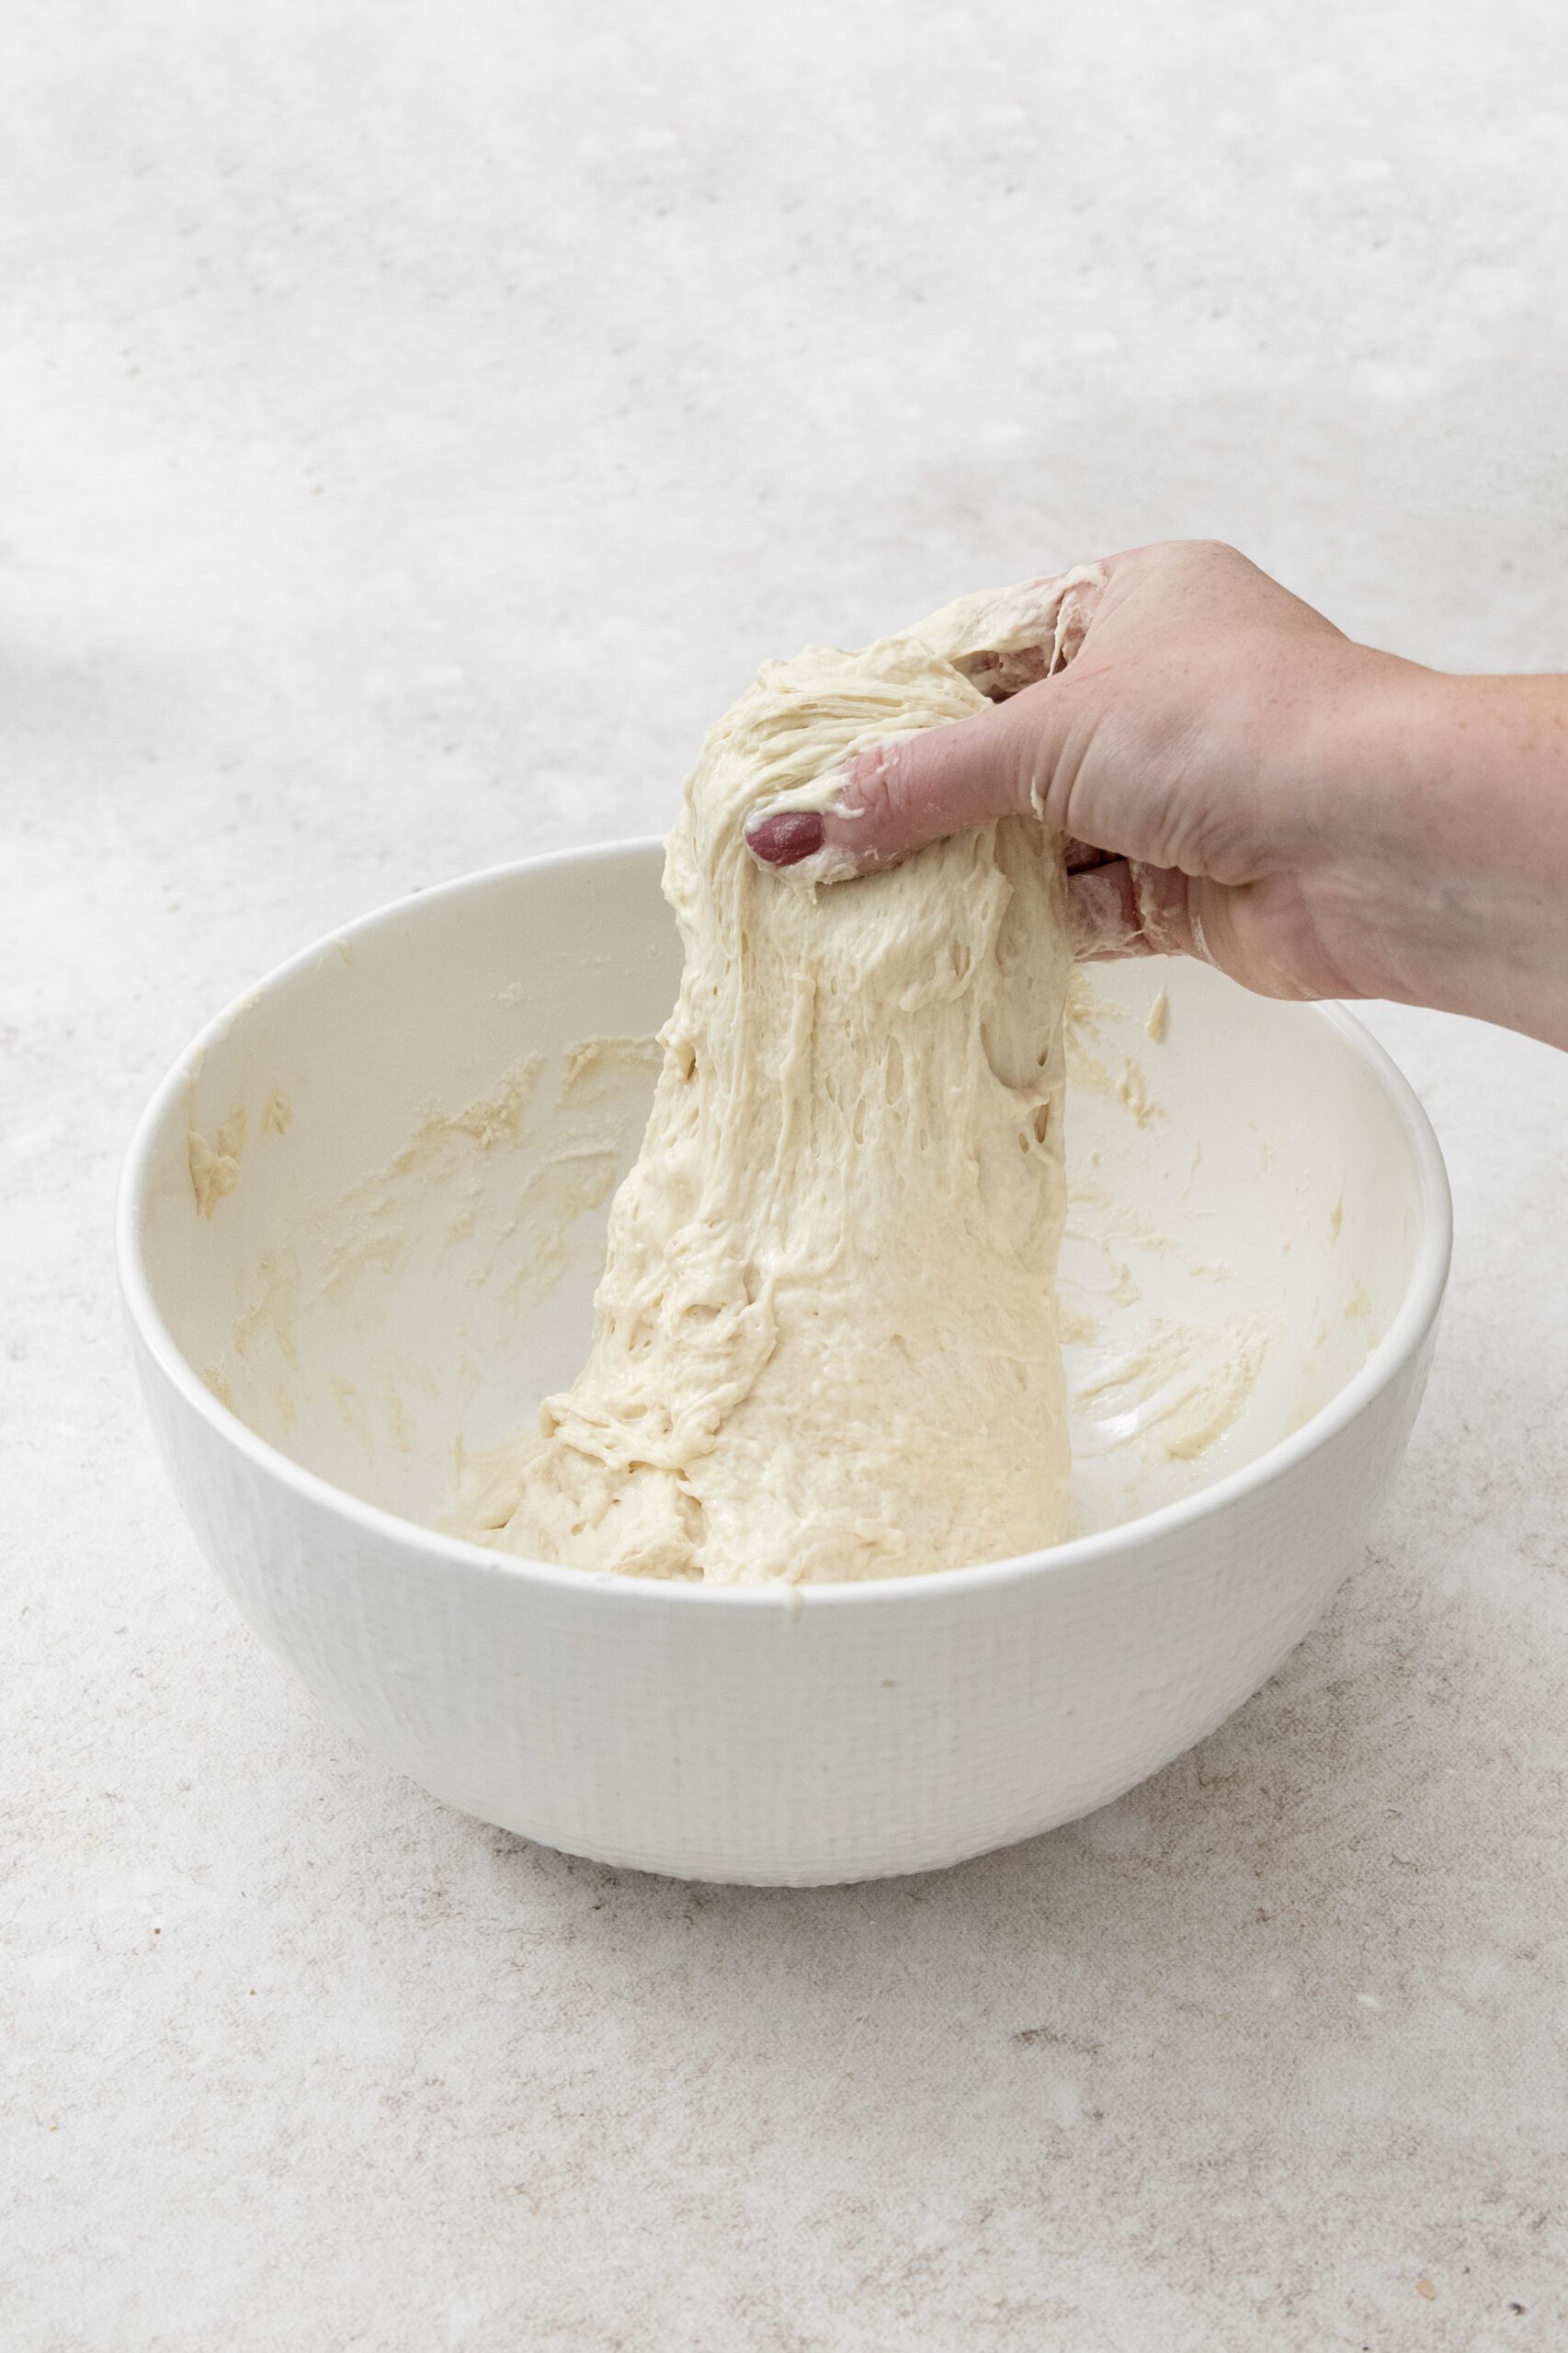
🥣 Mix dry ingredients then add in the water and mix with a wooden spoon. It should look like a loose & sticky bread dough, don’t worry this is what you want.
🥄 Add sugar, Kosher salt, and then AP flour and mix with a wooden spoon.
⏲️ Cover and let sit for 30 minutes.
⏲️ Stretch and fold it on itself in the bowl, cover and rest again for 60 minutes.
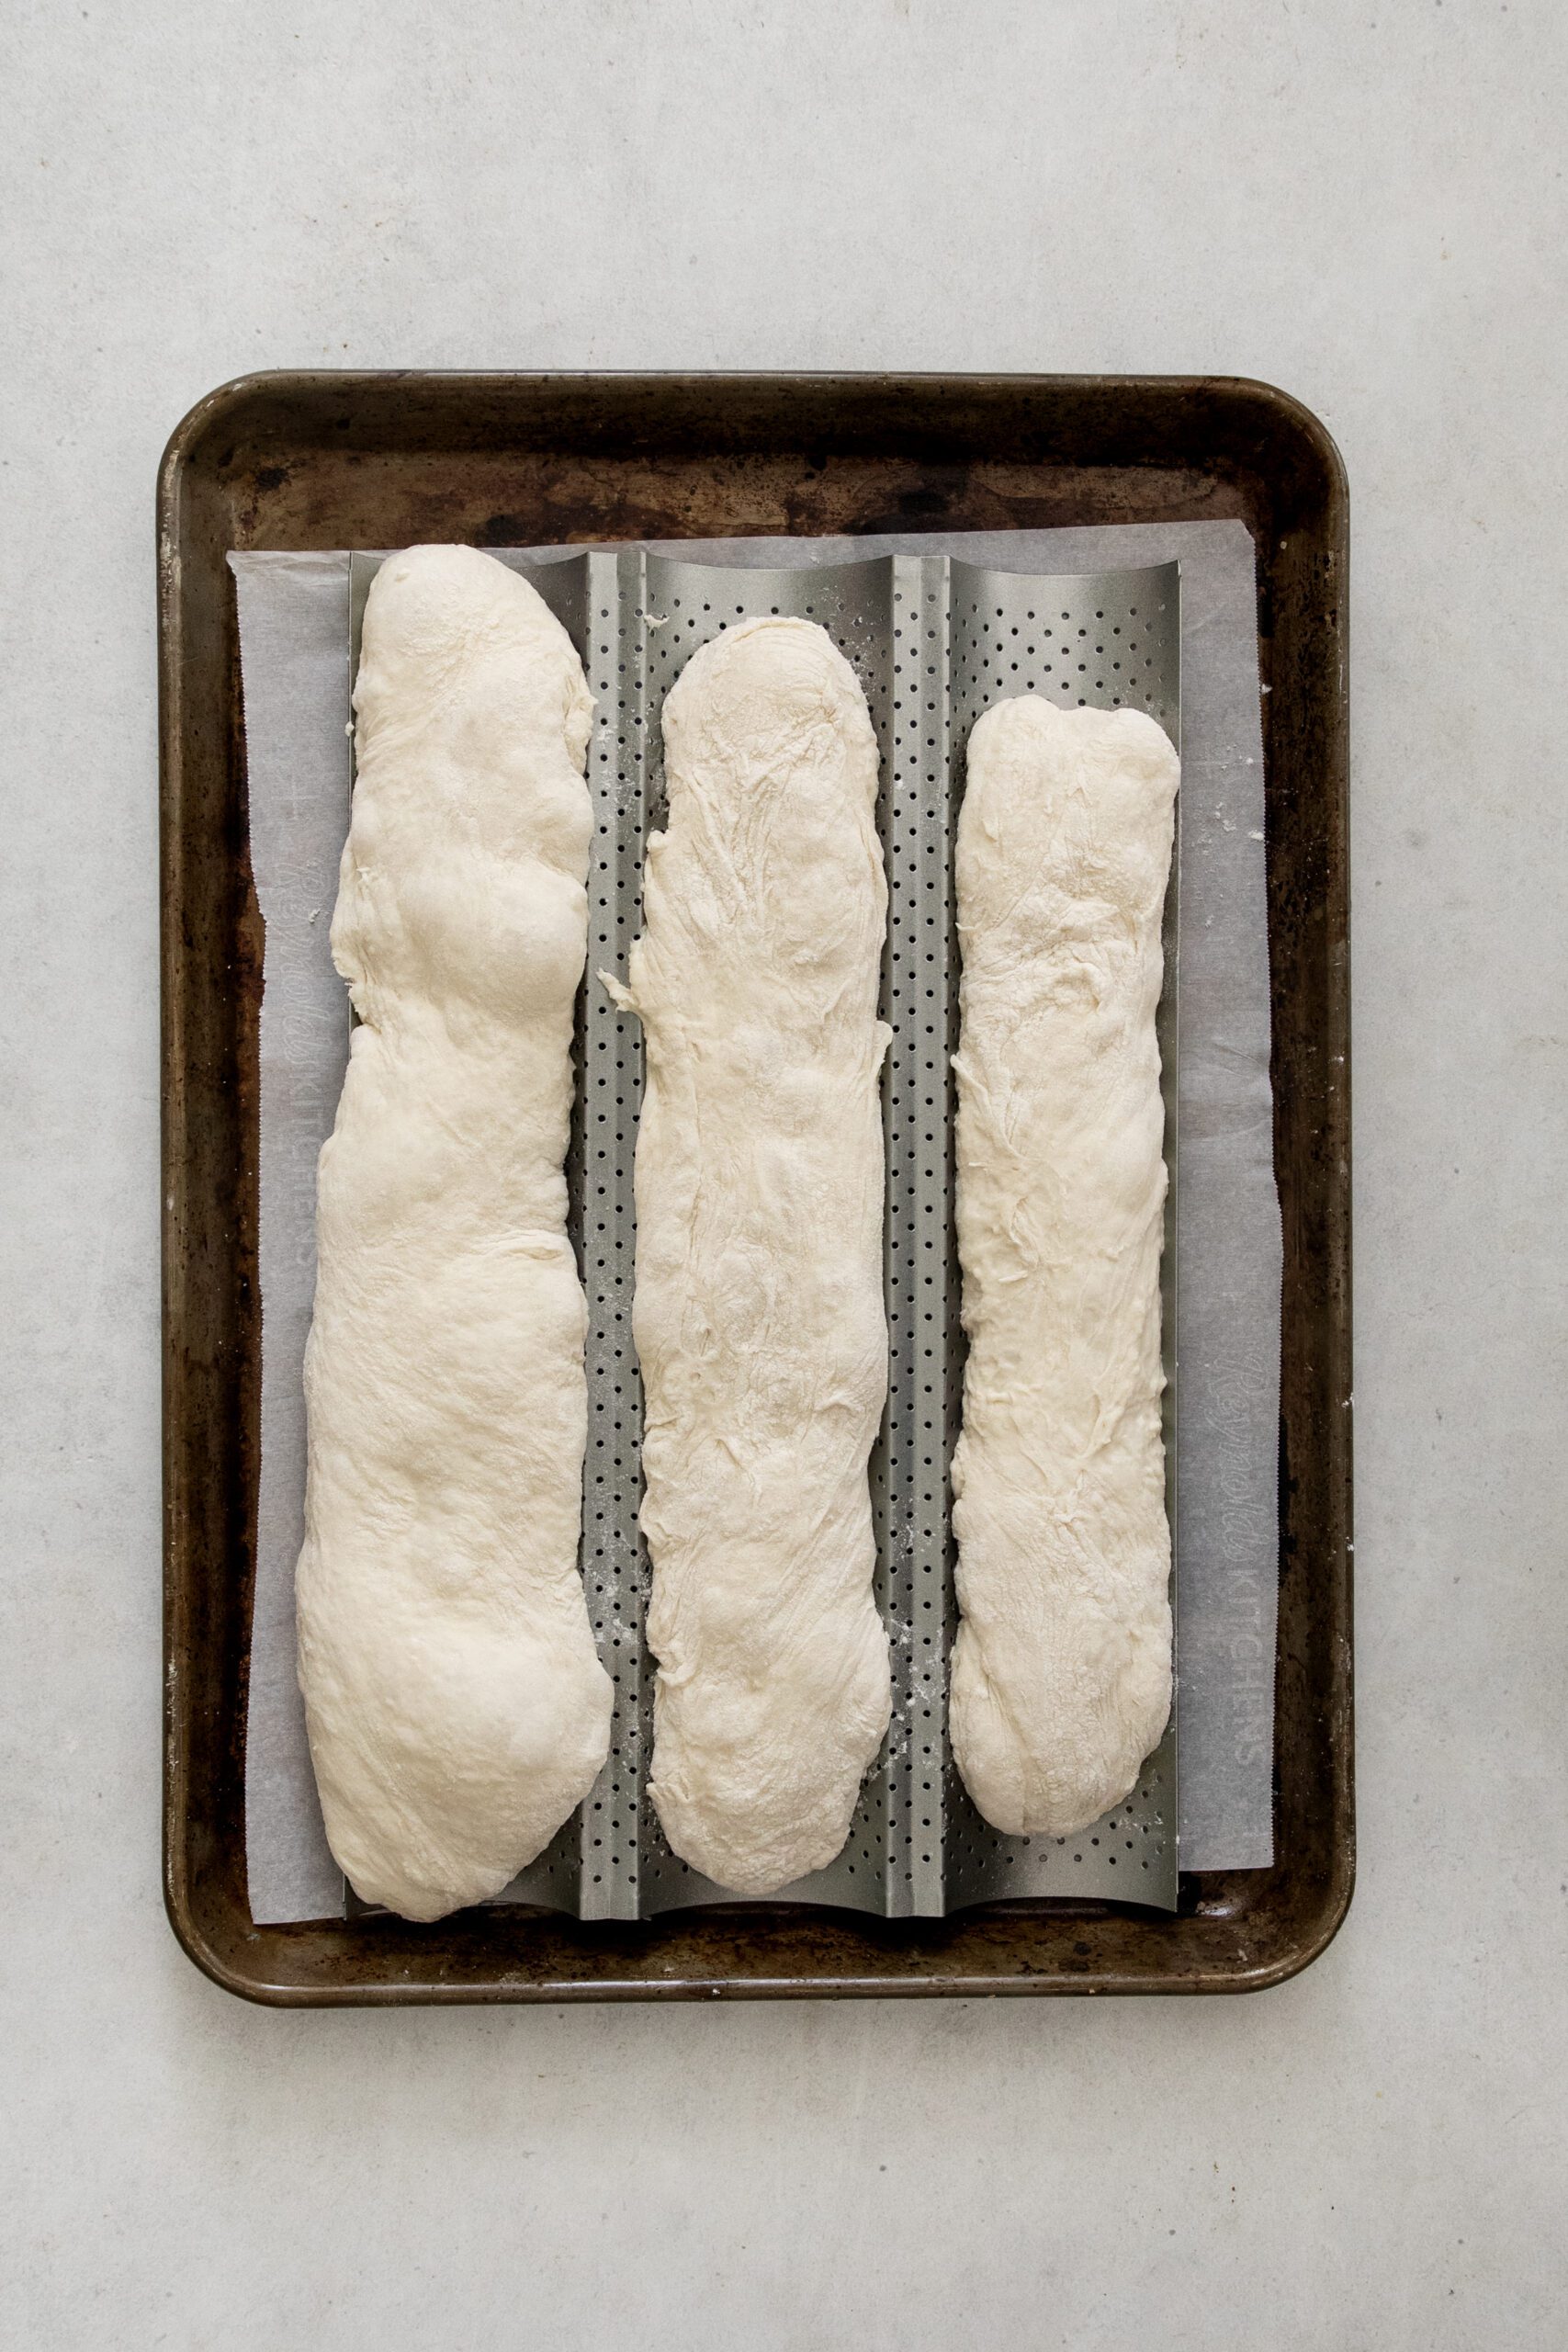
🫧 When it has risen and is bubbling, very gently turn out onto a generously floured surface.
✂️ Cut in three with a bench scraper.
🌀Twist a bit and place in baguette trays, shaping lightly.
⏲️ Bake for 25-30 minutes at 450.
🎩 Tips & Tricks
For a Dough-Rising Trick, Use Your Oven Light! During both resting periods, I like to create a cozy little spa for my dough by placing the covered bowl inside the oven with just the oven light turned on. Don’t turn the actual oven on, just the light. That small amount of heat from the bulb provides the perfect gently-warm, draft-free environment that helps the dough rise beautifully. Just cover your bowl with a kitchen towel, tuck it into the oven, and let the light do the rest.
📓 Best served with
- Good Butter and Flakey Sea Salt
- A delicious creamy soup such as my Creamy Roasted Tomato Soup or Butternut Squash and Garlic Soup
- On a Cheese and Charcuterie board next to a whipped feta with hot honey
Commonly Asked Questions
Great question! It’s a technique to build structure in wet doughs. Reach under the dough, gently stretch it upward, then fold it over onto itself. Rotate the bowl and repeat 3–4 times. It helps create that airy, open crumb without kneading. The dough should look like loose and sticky bread dough, don’t worry this is what you want!
No problem—you can use a sharp knife or even kitchen scissors (oiled or floured) to cut the dough into three sections. A bench scraper is just handy for keeping the shape and not deflating the dough too much.
I would highly recommend using one. A baguette tray gives structure and keeps the dough from spreading too much. I have had a lot of luck with this baguette tray & swear by it. If you don’t have one, shape the dough and bake on a parchment-lined sheet pan. You can place rolled-up foil or a clean kitchen towel between the loaves to help them hold shape during the rise.
450°F gives you that signature crispy crust. If your oven runs hot, you could try 425°F and extend the bake time by 5–10 minutes. Just make sure the loaves are golden and sound hollow when tapped.
For this recipe, because it is so exact, there really aren’t any substitutions.

Same Day Baguette
Equipment
- 1 Baguette Tray (with three baguette loaf holders)
Ingredients
- 2 tsp Instant Yeast
- 1 tsp Sugar
- 4 Cups All Purpose Flour
- 2 tsp Kosher Salt
- Warm Water
- Flaky salt (optional)
Instructions
- Mix sugar, flour, salt, and yeast with a wooden spoon. Add in 2 1/4 cups of warm water and mix to combine. It should look like a loose and sticky bread dough, don’t worry. It should be. If the dough doesn't look very wet, add in another 1/4 cup of warm water. I usually use 2 1/2 cups of warm water, personally.
- Cover and let sit for 30 minutes.
- Stretch and fold it on itself in the bowl, cover and rest again for 60 minutes.
- When it has risen a lot and bubbling, very gently turn out onto a generously floured surface. The dough will be very wet, so be generous with flouring the surface, your hands, and the bench scraper.
- Cut in three with a bench scraper.
- Twist the dough, stretching gently lengthwise as you do, so it almost fills the baguette tray. Place each loaf in the baguette trays. I often sprinkle with flaky salt now, this optional, but it's a nice salty crunch on the top of the loaves.
- Bake for 25-30 minutes at 450 degrees.
Notes
Nutrition
Nutrition information is automatically calculated, so should only be used as an approximation.


Hi Kat,
First off, thank you for this recipe.
I wasn’t going to try to make it !!!BREAD!!! But yours looked so yummy I thought I would try.
It did not turn out for me. I know that bread is a particular lady, she wants everything just right.
If the next time you make it you wouldn’t mind add the flour in grams to the recipe I would be most appreciative. I spooned then leveled the flour like Ina taught me, but it was too wet. When I went to stretch and fold it it just ran through my fingers. I add about 1/4 cup more flour hoping that would help. It did not.
I’m going to try again once I know the amount of flour in grams. Also I think my oven light made the oven too warm. So I’ll nix that next time, and cover it with a cloth instead of a plate. I will keep trying because you made this recipe so easy. Thank you again for that.
Hi Patty!
The same thing happened to me! I will try it again for sure.
Same here. 2.5 cups water is 592 mL, while 4 cups flour is 480 g, which results in a hydration level of 123%. Isn’t the hydration level generally supposed to be around 65-75%? When I converted cups to grams and made this recipe, my dough was so wet, it was unusable. I tried a different recipe that called for 500 g flour (3.5 cups) and 350 g water (1.5 cups) (70% hydration level) and the dough (and resulting baguette loaves) were perfect. As Patty said, it would be so helpful to have measurements in grams.
Hello ER,
Thank you for your comment.
I will try to make this again with your measurements.
I’m a little confused through, how can 4 cups = 480 grams of flour, and 3.5 cups = 500g.
Shouldn’t less cups = less grams?
Also wondering if you used the same amounts from the original recipe for the yeast, sugar and salt?
Thanks again for sharing your results! Can’t wait to try again!
Made the baguettes twice today! Divine! I am obviously doing something wrong in that my dough is way too wet to twist. I probably pressed in an entire extra cup of flour while shaping. Even with this happening- the taste and texture of the finished product was company worthy! Yummy!!
So glad you are enjoying!
Great recipe super easy and delicious
So glad you enjoyed! xo, Kat
This is so amazingly delicious; crisp outside and chewy inside. I love how easy it is to make and the baguette pan allows me to make 3 loaves with one recipe. I will be making this a lot
Thank you for sharing! So happy to hear 🙂 xo, Kat
If you have tried and failed sourdough this is your moment to shine like the chef you always knew you could be! This recipe is a unicorn. It is simple, you only need a few ingredients, it requires little hands on time and the results might just bring you to tears of joy. I know – it sounds too good to be true – but as I type this there are 3 baguettes on my counter that I made! Thank you Kat!
Hahah, I love it Amy! And its so true! Anyone can make this, no experience necessary!!! xo, Kat
Was eagerly awaiting this recipe and it did not disappoint! Crispy outside and lovely chew on inside . My boyfriend and I ate one loaf for dinner with fresh tomato bruschetta I made while it cooled .
Yummmm! This baguette with bruschetta sounds like heaven! SO glad you enjoyed! xo, kat
Hi there, I absolutely love your recipes and your page. I tried to make the baguettes today and they came out very very runny when I put them in the baguette pan. I thought from the other comments that maybe this was normal so I baked them as the directions said and the bread completely cooked through the holes of the baguette pan and got stuck and would not come off. Did I miss the direction to oil the baguette pan or possibly this is because I bought a different baguette pan that would come sooner than the one you recommended? I’d like to try again, so any advice is appreciated. Thank you.
This recipe is amazing! It came out perfectly and I can’t stop eating it! Never getting store bought again!
Yippeee! So happy to hear it, Summer! xo, Kat
Who knew baguettes could be so easy?! The dough is very sticky but it bakes up perfectly. The pan is a must and worth getting as this recipe will be on repeat- everyone in the family loved it!
Yay! SO happy to hear it, Val! Xo, Kat
The baguette with few ingredients is absolutely delicious! I was challenged a bit trying to make them beautiful but it’s okay because I will get better at it because I plan on marking these on a regular basis.
Hi Adriana! Im so happy you tried the recipe…you will get better each time you make them, I promise! Did you buy the baguette pan? Really does make a big difference! xo, Kat
I thought the dough was way too wet to work, especially since I don’t have a baguette pan yet, but it turned out beautifully. I had to stop my kids from eating all three loaves. I can’t wait to repeat with an actual pan next time.
Yay! So glad it was a hit with the family! Yes, its easy to second guess yourself, but trust that it will turn out even tho it looks overly sticky!
xo, kat